Filling stitches
How to do seed stitch
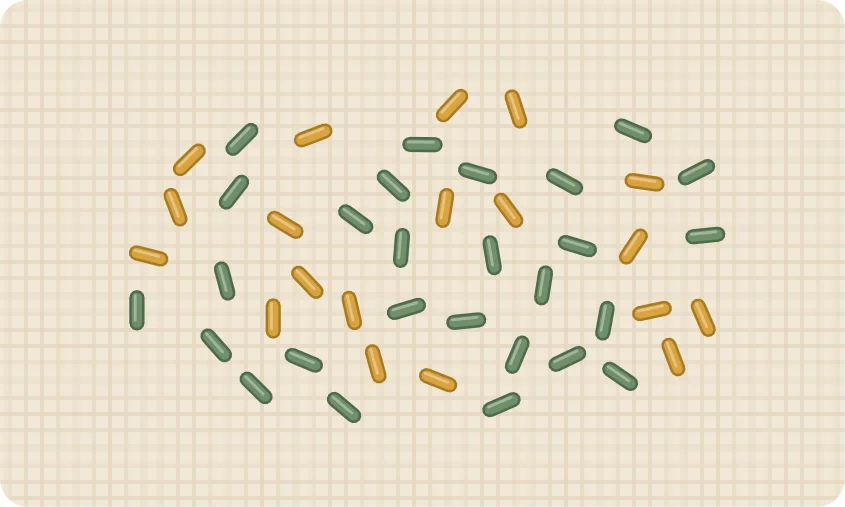
Seed stitch scatters tiny straight stitches across a shape, like seeds on the ground. It is relaxing to work and almost impossible to get wrong.
Use it forSpeckled texture and light fills
Strands2
LevelBeginner
Step by step
- Make a tiny straight stitch, about 1/8 inch long.
- Add more stitches scattered in different directions.
- Spread them evenly, or cluster them for shading.
Tip: Doubling each seed (two side by side) adds more color.
Getting it right
Space the seeds evenly for a light, sprinkled fill, or cluster them closer together at one edge for a simple shaded effect.
Seed stitch is used to fill the heart in the Spring Wreath. It adds color without hiding the fabric, which suits light, airy designs.
Try two colors mixed together, like pink and berry, for a speckled look that reads beautifully from a distance.
Common mistakes
- Stitches all pointing the same way. Turn each one a little.
- Seeds that are too long. Keep them about 1/8 inch.
Use seed stitch in these project ideas: personalized gifts, baby & family, wedding.