Filling stitches
How to do long & short stitch
Long and short stitch is how embroiderers paint with thread. It fills bigger areas than satin stitch and lets you blend one color into the next.
Use it forShading petals and larger areas
Strands1–2
LevelNext step
Step by step
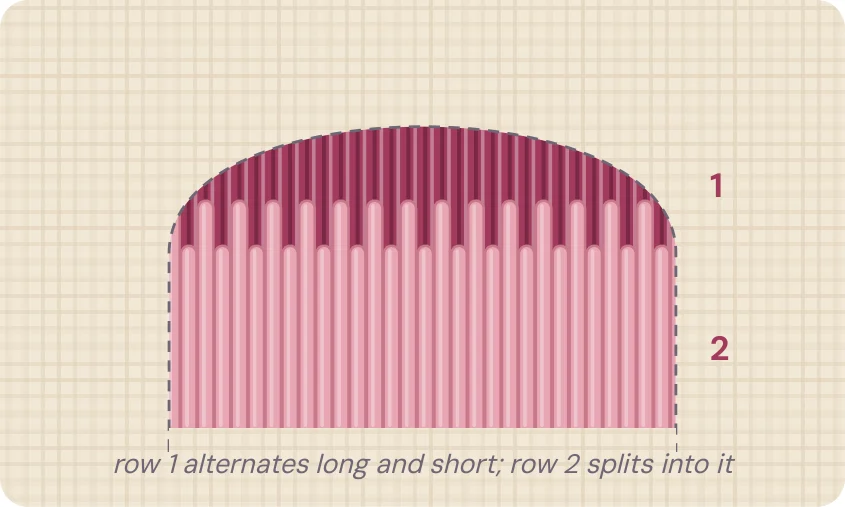
- Row 1: alternate long and short straight stitches along the edge.
- Row 2: work long stitches that come up into row 1, splitting it.
- Change thread shade on each row to blend color.
Tip: Keep stitches pointing toward the center of the flower.
Getting it right
The first row alternates long and short stitches along the outer edge. Every row after that uses long stitches that split up into the row before. The staggered rows hide the joins and create soft shading.
Use one or two strands and change to a slightly darker or lighter shade with each row. Three shades of one color are enough for a beautiful rose petal.
This is not a first-day stitch. Try it once the satin-stitch leaves in the wreath feel comfortable, perhaps on the large wings of the butterfly project.
Common mistakes
- Stitches all the same length, which creates hard stripes.
- Losing direction. Lightly draw guide lines toward the center first.