
Start here
Your first embroidery session
You don't need to master every stitch before you begin. Set aside about an hour, follow these five steps, and you'll have real stitches in your hoop.
- 1
Gather six essentials
A 6-inch hoop, smooth woven cotton, six-strand embroidery floss, a crewel needle, small sharp scissors and a fabric-safe marking pen.
See the beginner supply list → - 2
Get ready
Cut about 18 inches of floss, separate the strands you need, and tighten the fabric in the hoop until it sounds like a small drum when you tap it.
How many strands to use → - 3
Practice two stitches
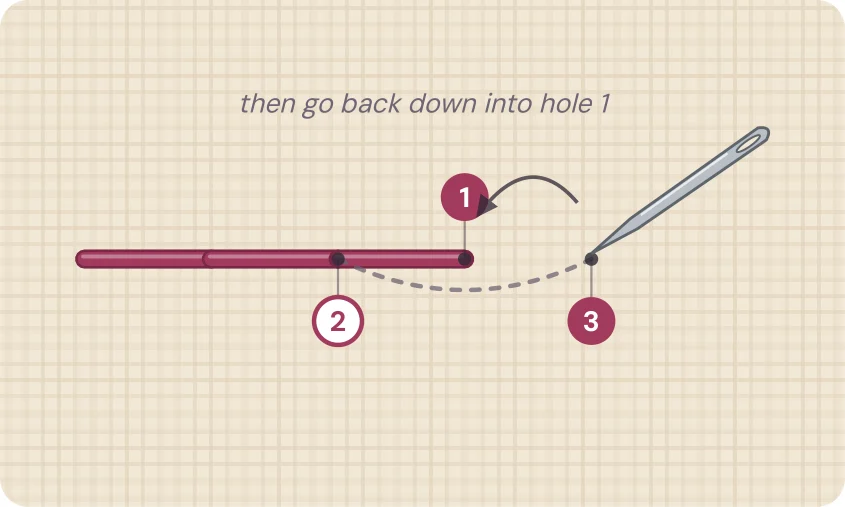
Work a short row of running stitch and a row of backstitch on scrap fabric. Follow the numbered holes in each diagram.
Learn backstitch → - 4
Choose your first project
Stitch the Spring Wreath or the beginner butterfly. Try any new stitch on scrap fabric first.
See the Spring Wreath → - 5
Finish and celebrate
Secure your thread ends, remove your marks and finish the hoop with a felt back. Your first piece doesn't need to be perfect to be worth keeping.
Finishing steps are in the guide →
Before you stitch
Test your marking pen and thread colors on a scrap of the same fabric. Keep needles and scissors stored safely. Good light, a magnifier if you like one, and short breaks make stitching more comfortable.
A good first-hour goal
One neat row each of running stitch and backstitch. That's enough to outline the whole wreath or butterfly. Everything else is a bonus.
Reading a stitch diagram
Every diagram on this site uses the same simple language. Numbers mark holes in the fabric. Each step tells you when to come up from the back or go down to the back. A hole can be used more than once, and dashed lines show thread travelling behind the fabric.
Free download
Learn the basics with the free Beginner Guide
18 illustrated pages: 12 essential stitches, the Spring Wreath and butterfly projects, clean tracing sheets and a printable practice tracker. Pay what you want, even $0.