Loops & knots
How to do a French knot
French knots have a reputation for being tricky, but there are only two secrets: keep the thread taut, and do not go back down in the same hole.
Use it forFlower centers, dots, and texture
Strands2–3
LevelBeginner
Step by step
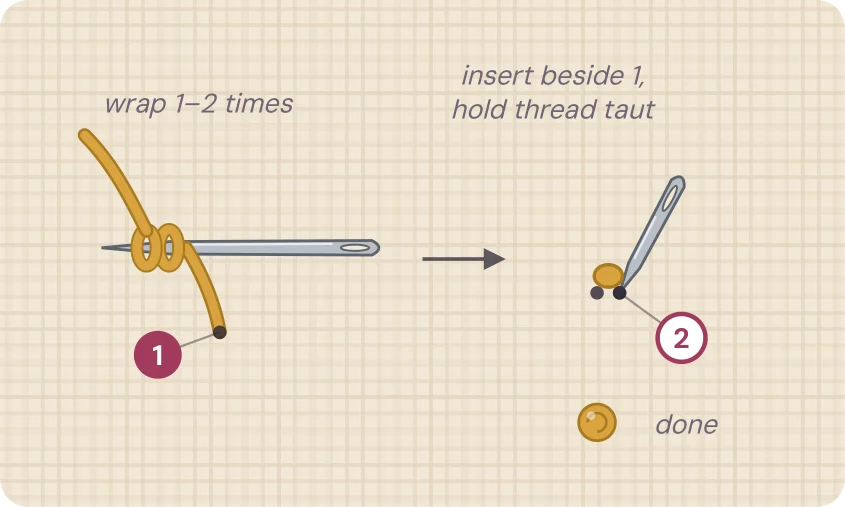
- Come up at 1 and wrap the thread around the needle once or twice.
- Insert the needle at 2, just beside 1, not in the same hole.
- Hold the thread taut while you pull through to the back.
Tip: For a bigger knot, use more strands rather than more wraps.
Getting it right
Hold the working thread with your other hand as you pull the needle through. That tension is what keeps the wraps tight around the needle and gives you a neat, round knot.
Going back into the exact hole you came up from lets the knot slip to the back. Go down one or two fabric threads away instead.
Want a bigger knot? Add strands instead of wraps. Many wraps tend to make a loose, messy knot. Use them for flower centers, eyes, polka dots and berries.
Common mistakes
- Going back into the same hole, so the knot disappears.
- Letting the thread go slack while you pull through.
Use French knot in these project ideas: personalized gifts, baby & family, wedding, church & business.