
Free beginner pattern
Beginner butterfly embroidery pattern
A simple companion to the Mrs. Embroidery butterfly. It uses only four stitches, so it's a perfect second hoop after the Spring Wreath.
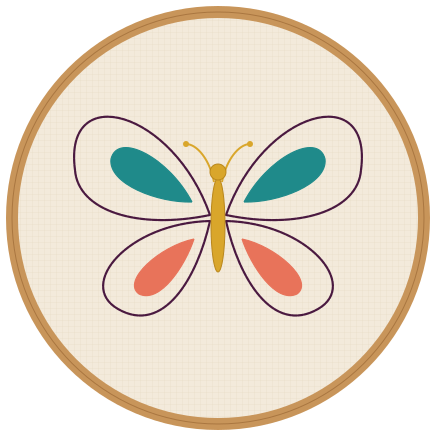
Colors
- Plum: wing outlines
- Teal: top wing fills
- Coral: bottom wing fills
- Warm gold: body and antennae
Use 2 strands throughout, with a 6-inch hoop, woven cotton and a crewel needle.
Step by step
- Transfer the butterfly and wing sections onto your fabric. The outer circle is a placement guide only.
- Outline the wings with short plum backstitches. Shorten your stitches as you turn around the curves.
- Fill the four small wing sections with satin stitch in teal (top) and coral (bottom). Leave the large wing areas unfilled.
- Stitch the body with short gold backstitches and the antennae in gold stem stitch. Add a tiny French knot at each tip if you like.
- Weave in your thread ends, remove marks as your pen instructions say, and finish the hoop.
Make it yours. Once you're comfortable, fill the large wing areas with long and short stitch. This beginner pattern is intentionally simpler than the detailed logo butterfly.
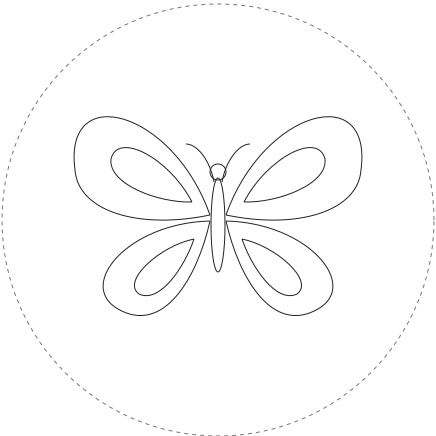
Stitches used: backstitch, satin stitch, stem stitch and French knot.
Free download
Learn the basics with the free Beginner Guide
18 illustrated pages: 12 essential stitches, the Spring Wreath and butterfly projects, clean tracing sheets and a printable practice tracker. Pay what you want, even $0.