Loops & knots
How to do fly stitch
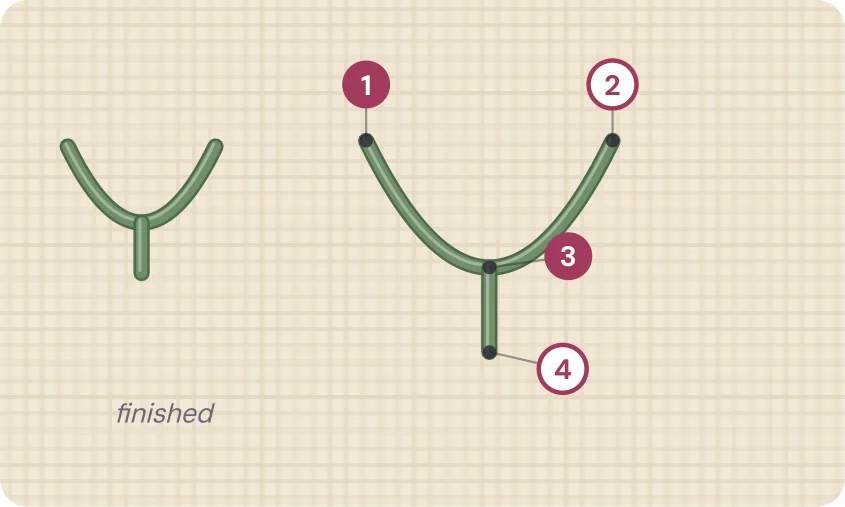
Fly stitch is an open V held down by a small stitch, so it looks like a Y. It is quick, natural-looking, and perfect for greenery.
Use it forLeaves, ferns, and grass
Strands2–3
LevelBeginner
Step by step
- Come up at 1 and go down at 2, leaving the thread slack.
- Come up at 3, below and between them, inside the loop.
- Go down at 4 to anchor the V in a Y shape.
Tip: Stack fly stitches tip to tail to build a fern.
Getting it right
Stack fly stitches one under another, each tucked into the last, and you have a fern or a fluffy leaf. Scatter single ones for grass or small sprigs.
Make the anchoring stitch longer and you get a stem below the V. Make it tiny and the stitch looks like a little bird in flight.
Fly stitch is a great way to add green between flowers on a baby blanket or a wedding handkerchief.
Common mistakes
- Pulling the V too tight before anchoring it.
- Uneven arms. Mark the two top points first.
Use fly stitch in these project ideas: personalized gifts, baby & family.